Alright, so by now you have applied all the quick wins to your daily work in Alteryx as well as documented it so thoroughly that even a person with zero alteryx knowledge would know what’s going on in your workflow. But are you sure that the workflow is indeed ready to be put into production yet?
Here are a few tips on how we make sure that your workflows are ready for the production environment.
Tip #8 List runner
Have you ever worked across multiple workflows that you would need to execute in a certain sequence? Fear no longer – the List Runner macro is here to help you out.
The List Runner macro is part of the CREW macro package. The List Runner tool takes a list of Alteryx modules as data input and runs them one after another. It will then output all the logs to a single output, and then indicate the existence of any errors, conversion errors, or warnings.
By using the list runner tool, you can run multiple workflows with a single click. At the same time, the process of debugging your sequence of workflows becomes much easier because the tool will indicate exactly what module, if any, failed.
Usually, we apply the list-runner tool in combination with the directory tool. The directory tool essentially allows us to, dynamically, import the full path to each file within a certain folder. By adjusting the file specification, similarly
Pro Tip
For better debugging, use the list runner tool in combination with the log parser tool (also part of the CREW macro package). The log parser tool will parse the log into an alteryx data table, which indicates not only the specific module but also the tool ID and meta-information associated with the source of error.
Tip #9 Put a timestamp to your data source
Have you ever found yourself in a situation where you would like to know exactly at what point in time a data source was last updated? Add a timestamp to your data source and fear no longer!
When you create reports, it is super important to be transparent about when the data source was last refreshed. One simple way to accomplish this is to append a timestamp to your data source. This can either be done by appending a timestamp to the output file name or add it as an additional column
to your dataset. In either case, this can be done via the function called DateTimeToday() in the formula tool.
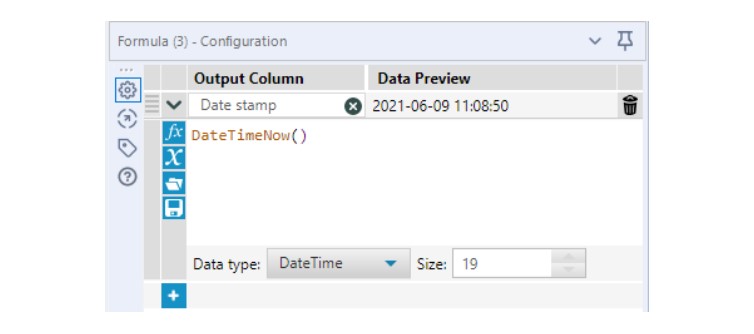
Add timestamp as an additional column in your data source
There are numerous ways to come around this. However, the most commonly used method is to use the formula tool. Here, we would simply add a new column, which simply applies the function DateTImeToday(). The function returns the date and the time of that specific day throughout that specific column:
Pro Tip
Timestamp the filename of your data source. Adding a timestamp to the filename of the data source is rather simple: Add a formula tool at the end of your workflow and specify it similarly as we’ve done here:
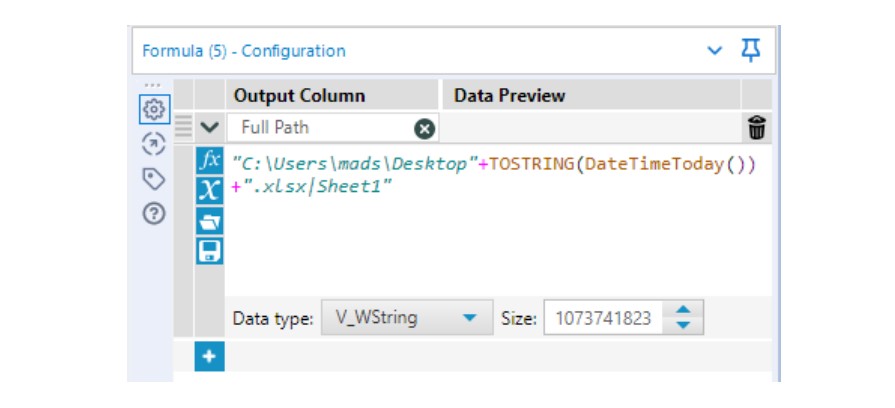
Here you should replace the “C:\Users\mads\Desktop” with the specific path that you want to save your data source to and furthermore, replace the “.xlsx|Sheet1” suffix with the specific file format you want to save it as. Once you have obtained the new column, you are ready to go.
Insert the Output Data tool and navigate to the bottom of the configuration pane:
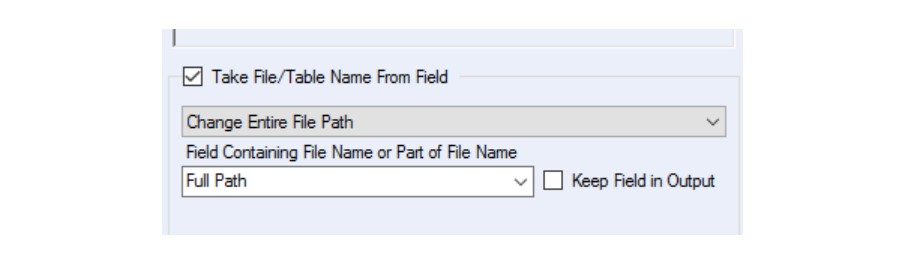
Here you can “Take File Name From Field” by “Changing Entire File Path” with the column that you just created. Voila! The filename will now include the specific date-time of the last refresh.
Tip #10 Validation: Checks and testing
Are all ratios supposed to sum to 100%? Do you expect data to fall out from your inner join?
These are likely some of the questions you have had when developing some of your workflows. We always recommend to conduct regular validation checks of your workflows and furthermore use these validation checks to ensure that nothing could possibly go wrong.
The message tool allows you to specify your own test criteria or rules, which will be included as a message, warning or error in the result pane. Additionally, you can specify the “Message Expression” yourself, which increases the level of information that is returned in the message. The Message tool works very well with the List Runner tool, as you can check for the existence of errors or warnings
in any of the workflows included in the List runner.
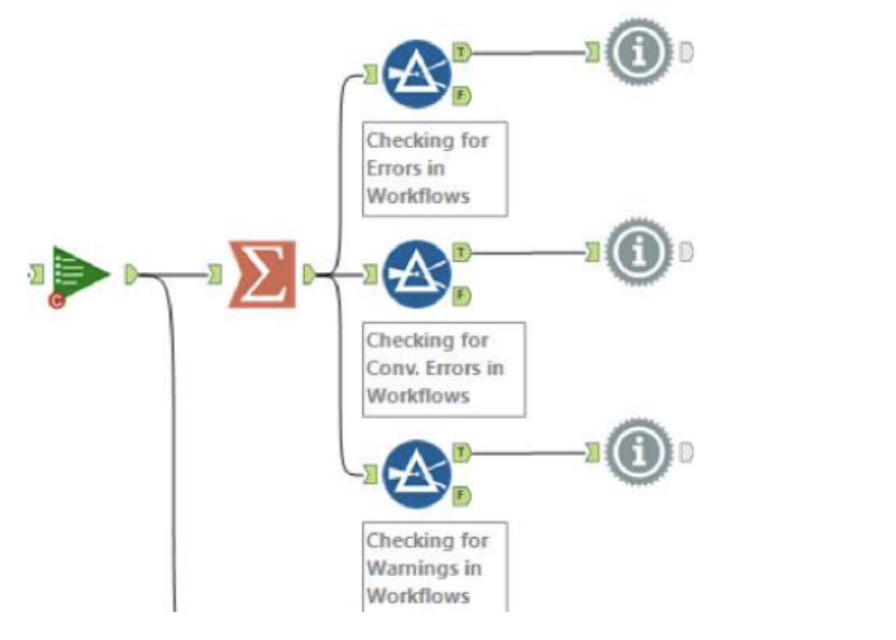
The configuration of the message tool is easy:
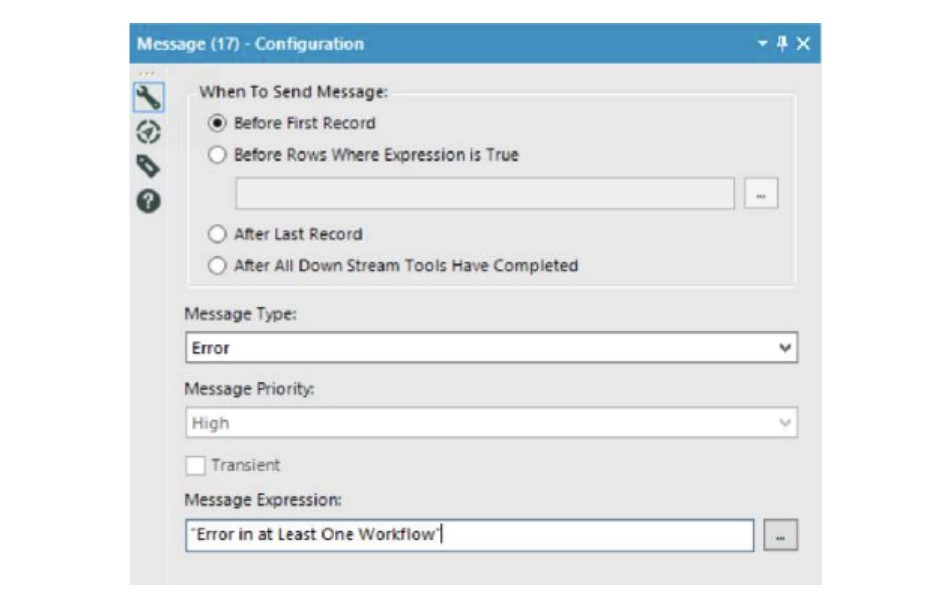
- First, you specify when the message tool should be activated. In the case above, in which we summarize the errors and warnings from a list runner tool, we choose to send a message “before the first record” similar to the picture below.
- Choose what message type it should have (warnings, errors, conversion errors).
- Set a message priority: For validation purposes, we usually set those as “High”.
- Write the message expression. Keep it as tidy and intuitive as possible.
Tip #11 Structure is everything! Clean up your workflow
At Inviso by Devoteam, we keep a quite strict clean-desk policy at the end of our working days. The clean-desk has slowly, but surely integrated into the DNA of the workflows that we build for clients
nowadays. Here are two examples of the ways we clean workflows:
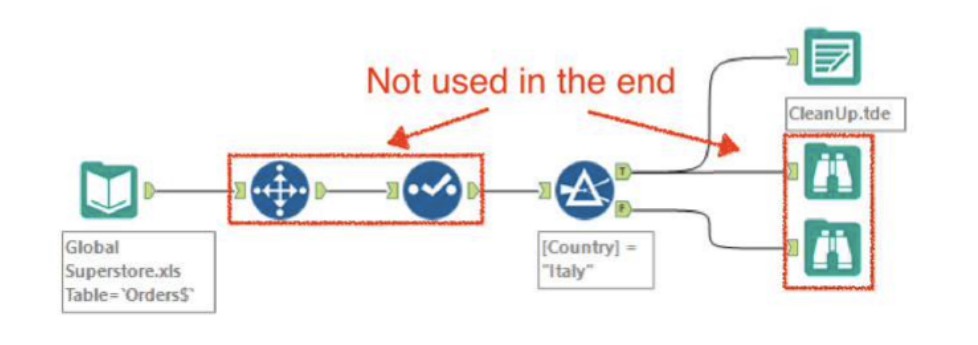
- Make sure that you don’t retain any unnecessary tools. This could be a select tool that was used to ensure your data set contained the right data types, or a sort tool that was used to validate your workflow, or any tool that is no longer relevant once the workflow is complete.
- Find the shortest route from input to output. Once you have solved your problem, you might benefit from constructing your workflow all over again. Often, you will discover that you can accomplish the same result with fewer steps. This review process will also help ensure that you are not dragging along data that you are not using in the end.
By cleaning up you will improve both the efficiency and the overview of your workflow. Your analysis will run faster, you will be able to easily hand over your workflow to a colleague or client, and it will be simpler to return to your old workflows.
Pro tip
Align multiple tools horizontally or vertically all at once. For horizontal alignment, mark the tools that you want to align and press “control+shift+-”. The short-cut for vertical alignment is similarly “control+shift+’+’”.
Tip #12 Folder structure
Follow a tight and rule-based folder structure on your harddisk.
Having a logical folder structure for your data projects gives a great overview of your work. And more importantly, it will be much easier for you to hand over to your colleagues at some point.
Below, we have inserted an example of a way you could be organizing your work. This structure separates from Project 1 files into Alteryx Archive, Data, and Tableau folders. All Alteryx workflows and output go into their respective Alteryx sub-folders. Similarly, the Tableau Data Extracts and Tableau Dashboards are
stored in the matching Tableau sub-folder. Lastly, an Archive folder has been created to store old workflows etc. that might be of interest in the future or that can work as backup.
Folder structure – overview
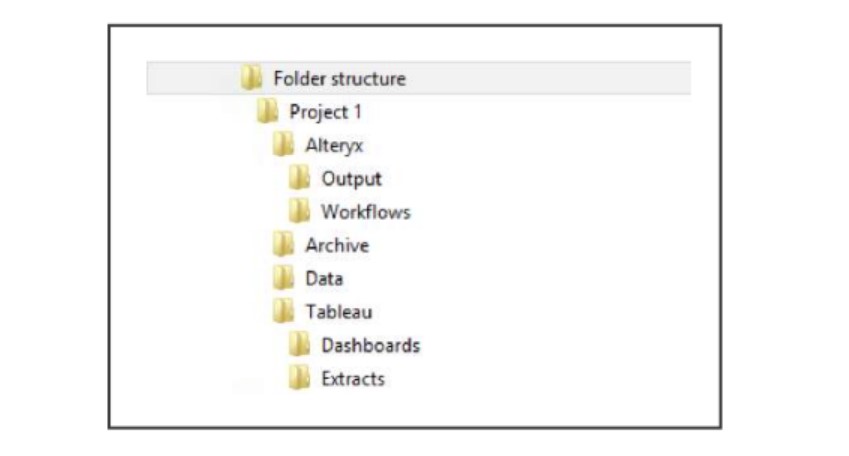
Folder level 1 – Project 1
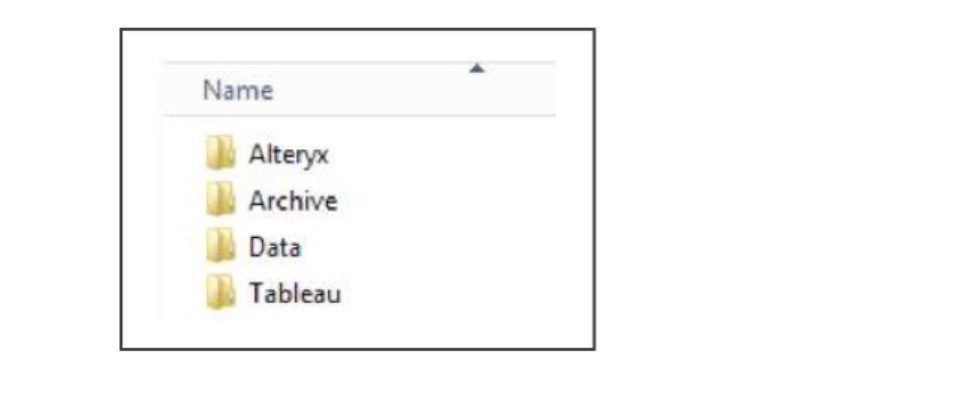
Folder level 2 –
Folder level 2 –

Folder level 2 –
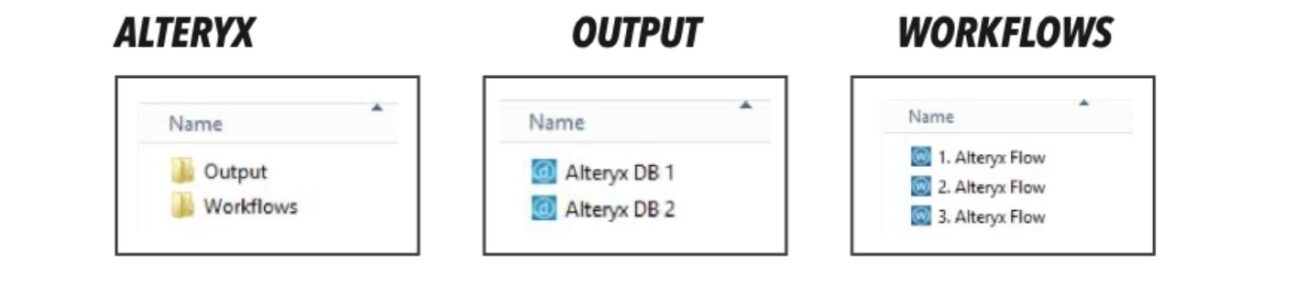
Pro tip
Did you notice that our workflows are numbered? Yep, you got it! That they can all be run in sequential order using the List runner tool!
Tip #13: Relative dependencies
Relative paths define relations to the location of the workflow on the user’s system. There are relative paths for inputs as well as outputs. If you are using absolute paths and you change the position of the
workflow (or your colleague tries to access it), they tend to break as the absolute path of either the workflow itself of the assets included have changed. Applying relative paths will help to overcome this problem!
Relative Dependencies give you great flexibility when sharing, distributing, and deploying workflows across an organization because you can move your flows around easily.
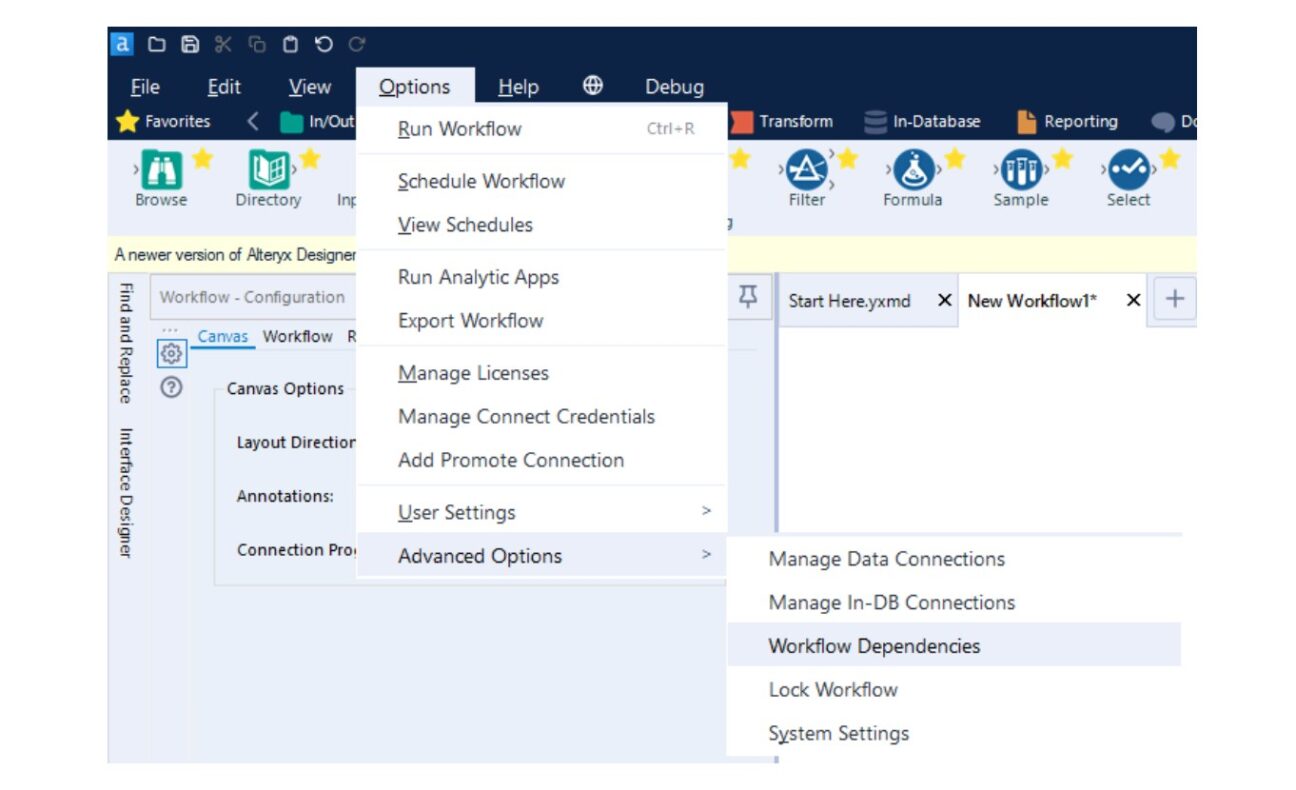
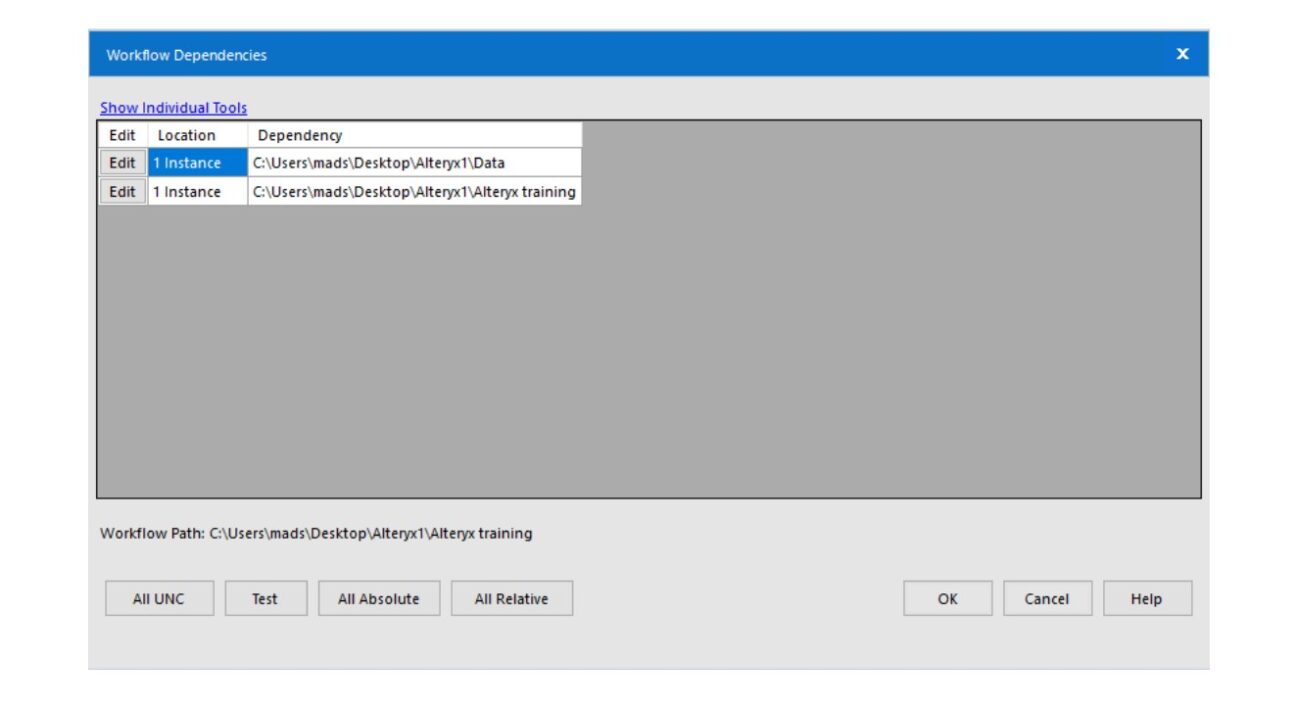
When you open the Workflow Dependencies dialog, you will be able to change one (click Edit) or all (click All Relative) of the workflow dependencies. You can change the dependencies of your workflow by going to the toolbar and following these steps: Options -> Advanced Options -> Workflow Dependencies: