It is always best practice to carefully document your workflows. In this section, we will go through how we usually document our work in Alteryx.
We always stress the importance of documentation as: You might hand over your workflows to a colleague (or client) or you might return to work that is several years old. All of this is just so much easier
with adequate documentation.
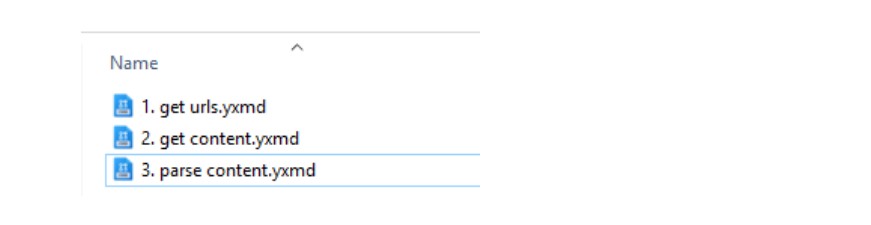
Tip #4 Document your workflow using descriptive titles
When you are working with multiple workflows, it is important to give them adequate descriptive titles. If your workflows are dependent on each other, i.e. that you need workflow A to execute before executing workflow B, we find it very useful to enumerate them as well.
Descriptive and numbered titles will make it easier to decode the workflow dependency and to maintain an idea of what is going on, without opening each of the workflows individually. Here’s an example of descriptive titles and enumeration:
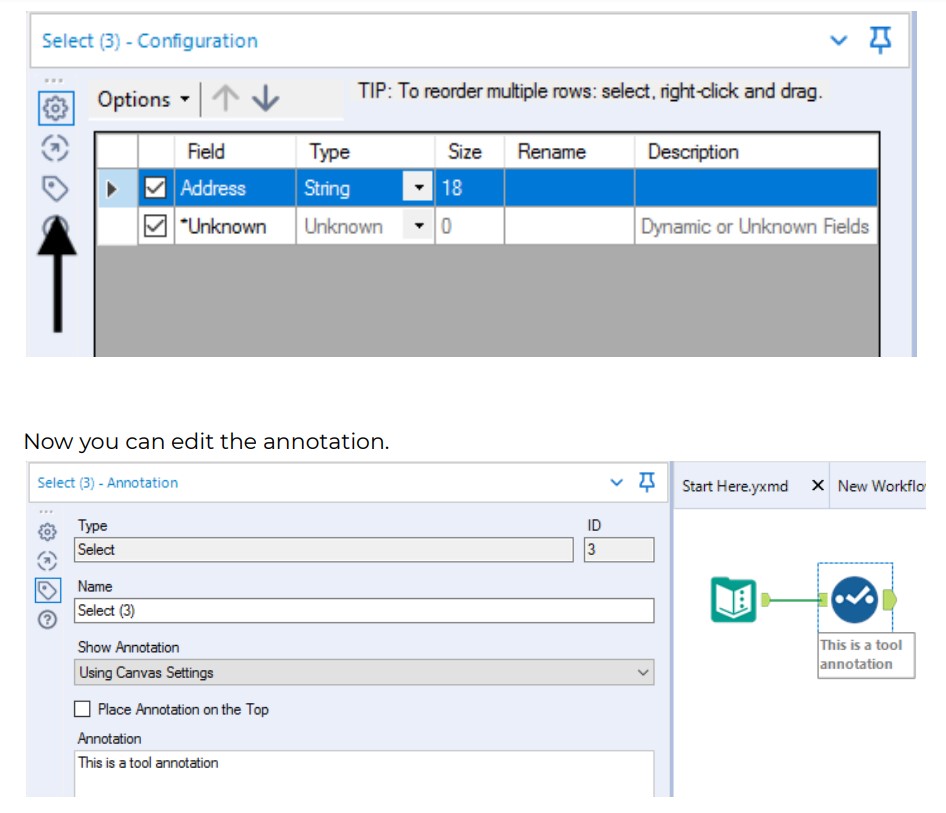
Tip #5 Use tool annotations
Another aspect of good documentation involves keeping track of what is going on inside your workflow. There are several ways to keep your workflow clean and easy to understand: One of them is to make use of the tool annotations. Tool annotations are short and brief descriptions of what is happening within the
different tools.
Using tool annotations we recommend you to make sure that you write short and precise comments. The annotations are helpful, as they give you an indication of the purpose of why the specific tool is included in the workflow. Additionally, the annotation will stick to the tool even though it might be moved elsewhere. You can edit the tool annotations by clicking on the specific tool and hit the “label” icon on your left-hand side in the configuration box:
Tip #6 Use the comment tool
Even though we always stress the importance of using tool annotations, we do admit that workflows can become so complicated that you can’t explain the steps in each tool short and concisely. In this case, the comment tool might come in handy. The comment tool is a text box and can be moved anywhere on the canvas.
Note: Unlike tool annotations, text boxes will not stay fixed to the tool itself.
The comment tool also has additional features, as it allows you to change shape, color, alignment, font styles, and background images. This way you can create a stronger identity of the workflow that you have built for the brand that you are representing. An example of this is represented below.
The comment tool is great here because it allows you to format it in multiple different ways by changing the shape of the box, including background colors,change the font or even include a picture.
Tip #7 Use Tool Containers
Tool Containers can organize and segment tools on the Designer canvas.
Tool containers are often used to group parts of your workflow into stages. This helps to keep a clear and tidy overview of which tools are used together in each step of your analysis.
Like the comment tool, you can personalize it in a number of ways: You can add names and colors to the tool containers, which will strengthen their grouping and make the workflow easier to understand.
Additionally, the layout inside of a Tool Container will be kept, even if it is moved around the canvas. For this reason, it can be particularly beneficial to use Tool Containers in conjunction with the Comment tool.
Tool Container Tool
Use Tool Containers to organize and segment tools on the Designer canvas. For example, you can use a Tool Container to prevent the container tools from running with the selected segment of the workflow.
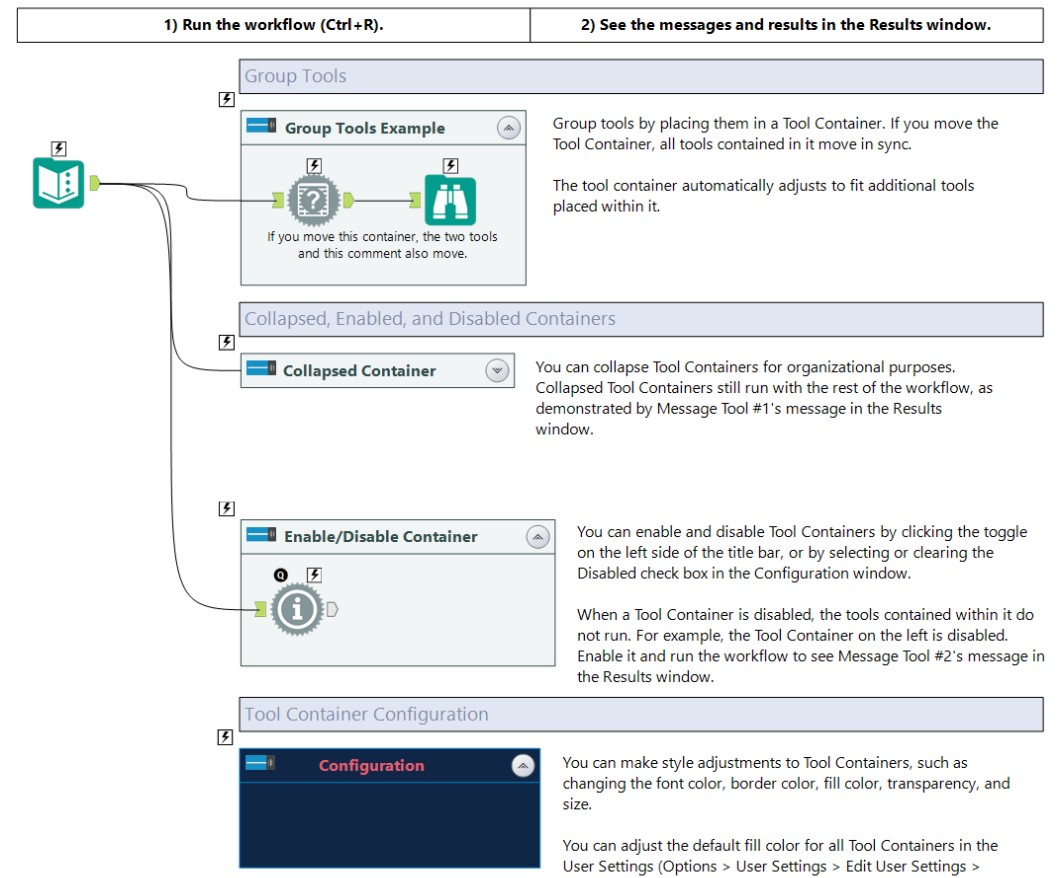
Pro Tip
The screenshot above is taken directly from Alteryx’s own sample workflow. If you want to see how they use best practices when it comes to documentation, we will highly recommend taking a closer look at their sample workflows. You can find them by navigating to:
“Help” -> “Sample workflows” -> choose your desired tool.
Pro Tip Extra
Did you know that you can enable or disable containers? Click on the toggle in the upper left-hand corner to enable/disable the specific tool container. You can also enable/disable tool containers dynamically when including them in a macro/analytical app? Read more on that here.

